A while back, I ran across a two old rotary telephones from my childhood and, with a couple of analog telephone adapter boxes and an Asterisk Docker container, I set them up as a sort of retro intercom in the house. WirelessCouch Bell, if you will. Fast forward a couple of years to June of 2024, and Los Alamos STEAMlab and Samizdat Bookstore both thought it would be fun to have old phones in their spaces that they could set up for kids and customers to use to listen to prerecorded stories or other messages. Having gained some experience with Asterisk, I figured I could help create some self-contained Dial-a-Story boxes for them.
The Plan
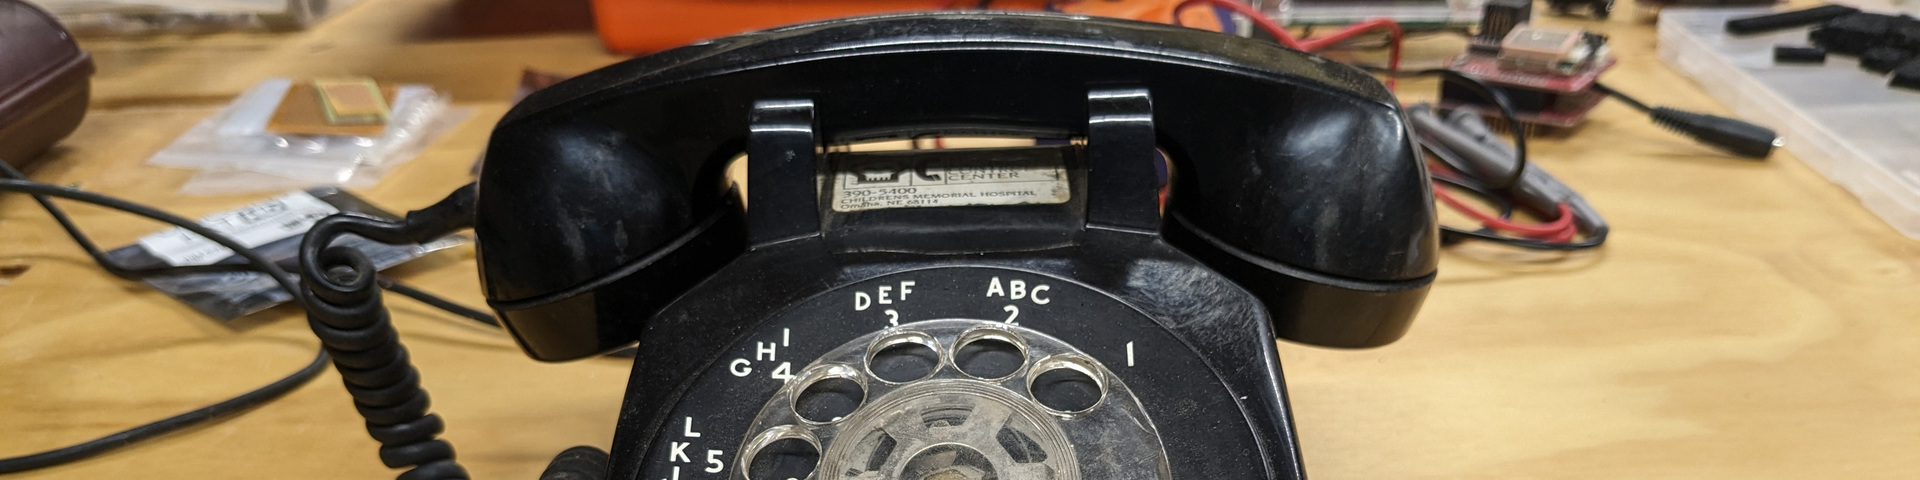
Asterisk is normally used as a full-featured telephone backend, but it’s also capable of just running a couple of phones on pretty modest hardware. Simple testing proved that a Raspberry Pi 4 could easily handle the service configured for a single extension, and the plan started to take shape.
My goals going into this were:
- To build a self-contained box held the hardware and had two ports: one for power, and one for a telephone
- To support standard vintage telephones, whether rotary or touchtone
- To make it really easy to add new stories, without needing to edit Asterisk configs or restart services or anything like that
After mocking up a containerized Asterisk install running on a Pi 4 board that was directly plugged in to a Grandstream HT801 Analog Telephone Adapter (ATA) via Ethernet, I knew I could meet the “self-contained” and “vintage telephones” goals. By writing up an Asterisk config and AGI script that would answer any phone number and choose a file from a defined directory on the Pi, I could also meet the “easy to add new stories” goal.
With that plan in place, it was time to start implementing it!
The Supplies
Other than the HT801 ATA, Adafruit had all of the electronic parts I needed:
- Raspberry Pi 4 (and an SD card for it) – Runs the Asterisk telephony software
- Grandstream HT801 – The Analog Telephone Adapter that interfaces between the rotary phone and Asterisk on the Raspberry Pi
- Short USB power cable – Provides power to the HT801 from one of the Raspberry Pi’s USB ports
- Short ethernet cable – Connects the HT801 and the Pi together so they can talk to each other
- Panel-mount RJ-11 – Provides an external phone jack for the HT801
- Panel-mount USB-C – Provides an external USB power port for the Pi
- USB-C power adapter – Powers the whole thing
I also needed a box to put it all in, which I built with some pine boards I had in the workshop and some hinges and a hook latch from the hardware store.
The Code
I started out by putting together the software that would make the plan work. The software stack is built around a self-contained, containerized Asterisk install that runs on a lightly-configured base Raspberry Pi OS image. See it all on github: https://github.com/cluening/dial-a-song.
Asterisk Config
For simplicity, I wanted a very minimal Asterisk config that would be easy to maintain. I started out by minimizing the number of modules being loaded in conf/modules.conf to reduce the server’s memory and processing footprint.
Next, I added a single config object to conf/pjsip.conf, which I called ext1414 for historical reasons. This config file has a hard-coded password in it, but I’m not too worried about that since all an attacker could get out of it is the ability to listen to some stories.
Finally, there’s only one extension defined in conf/extensions.conf: one that matches any dialed number and runs the dial-a-song.sh AGI script. The script does all of the work of selecting which file to play back, meaning I don’t need to edit the extension configuration to add new phone numbers.
AGI Script
The AGI script in scripts/dial-a-song.sh is a simple bash script that answers the call and selects a file to play based on the phone number that was dialed. The sound files themselves are MP3s named with the format NNN-any_string.mp3, where:
NNNis the phone number associated with this file, without dashes, periods, or any other separators. Numbers can be of an length greater than one.any_stringis an arbitrary string that helps humans identify the file.- The phone number and the human readable string are separated by a single dash (
-) character
The script simply searches the sounds directory for all files whose names start with the number being dialed, and chooses a random one from the resulting list. If no files match the number, I included a default “We’re sorry, your call could not go through” file that gets chosen instead. Once a file is selected, it is played with Asterisk’s MP3Player module, after which the script hangs up the phone.
Container
All of the above is bundled together into a Docker-style container that’s defined in Dockerfile in the repo. It’s a simple Dockerfile that builds on an Ubuntu base, installs Asterisk and any other needed dependencies, and copies the configs and scripts described above into the image. Once built, it’s ready to run! By bind-mounting in the directory of sound files from the host OS, new files can be added without any changes to the container image.
Ansible
To make the build as reproducible as possible, I put together a simple Ansible repository in the ansiblerepo/ directory that performs some setup tasks on the Pi:
- Install podman and some other base packages
- Set up the Pi’s ethernet interface for talking directly to the ATA
- Create the directory that holds the sound files
- Configure and start the Asterisk container as a systemd service
It’s mainly meant to be run once on a fresh Raspberry Pi OS install to get the image ready, so it’s not very complex at all.
The Box
With the electronics working, I need a place to put them. I initially planned to build a small box that could be tucked away out of sight, but Lis noted that building something that the phone could sit on top of would be a nice feature. This helps with the self-containment goal and makes it possible to open the box and describe the insides to curious callers, so that’s the direction I went.

The box is built of some pine boards I had in the shop with simple box joints on the corners.

When the glue was dry, I sanded the sides down and cut the box open so I could brand, stain, and apply Minwax poly to it. While none of the components I was using get too hot, I also drilled some vent holes in the sides of the lid to make air circulation possible.
The Result

And there it is! A Bell model 500 style phone sits nicely on top of the box, as do other phones of similar design. The box has two ports on the back: one RJ-11 port for the phone, and one USB-C port for power. Plug it in, wait for it to boot up, and it’s ready to play stories!

The parts fit inside with plenty of room to spare. While I could have shrunk the box down considerably by packing everything more closely together, I like that the phone can sit on top of the box and that there’s more air volume for cooling.